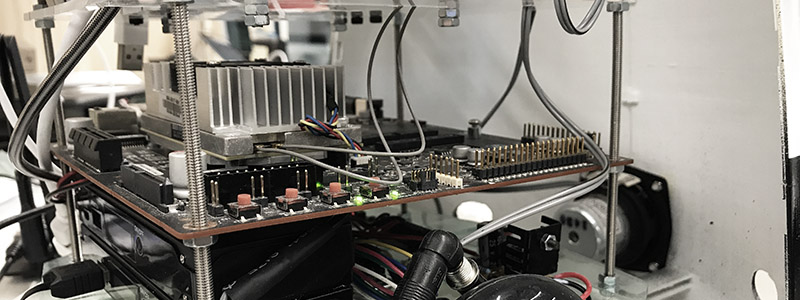
I’ve had a lot of networking troubles with the Jetson boards, which has made using Jetpack quite difficult. My workaround was to uninstall NetworkManager and create a wpa_supplicant configuration and manage connections using wpa_supplicant in the terminal. I recently discovered that NetworkManager is fine, but for some reason defaults to using an MTU of 9000. The routers in our lab just didn’t like this massive size and reducing it to 1500 instantly fixed our network problems.
I needed to break the Jetpack installation process into two steps. First, flash the Jetson using the USB interface. Then log into the jetson and connect to the wifi, set the MTU rate and go ahead with the network step of the installation process. Don’t bother with OpenCV - you will end up rebuilding it to get python-cv up and running anyway.
For robot/remote applications I find nomachine works quite well for remote desktop control. They have an arm64 download that installs easily and uses the NX protocol which works well with variable network speeds.
After installing Ubuntu, CUDA and cuDNN using jetpack, the first thing I wanted to do with the TX2 was get some deep learning models happening.
Installing Pytorch on the old TX1 was a difficult process, as the 4GB of memory was not enough to perform a build on the device without forcing a single thread build process that took hours. Thankfully the 8GB on the TX2 makes it much easier and faster.
The easiest way to build Pytorch is to use Cmake - but the highest version of Cmake you can get precompiled from apt for ARM64 is not high enough for newer versions of PyTorch, so the first step is to get and build Cmake.
After Cmake is installed you can go ahead and build pytorch. Keep an eye on the build log to make sure it is finding CUDA and cuDNN to make sure your deep learning projects will utilise the onboard GPU.
https://github.com/pytorch/pytorch
If you aren’t too worried about having the latest version of tensorflow, github user openzeka has a great repository with a prebuilt version of tensorflow 1.6 for the TX2 - which I have used with several tensorflow projects without issue. I haven’t tried building more recent versions from source, but will update if I do.
https://github.com/openzeka/Tensorflow-for-Jetson-TX2
One of the projects I’ve been doing with the TX2 involves speech-synthesis. For this I’m using the popular python audio library librosa, which was actually the most time-consuming aspect of setting up the TX2. Librosa requires llvmlite which requires LLVM. Llvmlite needs to be built with the same compiler as LLVM so it is best to build LLVM instead of trying to use the prebuilt libraries. Some tips for building LLVM:
Don’t use LLVM 6.0.0 - there is a signifacant bug in 6.0.0 which will stop you from being able to build llvmlite.
If you run Cmake without additional flags, the build for LLVM is over 16GB - and you will run out of space on the TX2 storage drive. By setting a release build and limiting the set of architectures you are building for, this comes down to less than 2GB and a much faster build. This will save you half a working day.
cmake $LLVM_SRC_DIR -DCMAKE_BUILD_TYPE=Release -DLLVM_TARGETS_TO_BUILD=”ARM;X86;AArch64”
I managed to run make with the -j4 flag without running into memory problems.
Once LLVM is installed, building llvmlite should be smooth.
I’ve been using the great deepvoice3 implementation by github user r9y9, which uses pytorch and librosa. On the TX1 there was a bit too much lag for conversational response speeds, but the TX2 holds up well enough if you keep spoken sentences short.
https://github.com/r9y9/deepvoice3_pytorch
We are using the TX2 in our lab robot Dave, and manage to do real-time machine vision with localised object detection, speech synthesis, natural language processing, neural style transfer and navigation tasks. We will dedicate another post to the robot itself and I’ll update this post with more tips and tracks using this computer as I work more with it.